At first glance, it might seem vain or narcissistic when you see someone filming themselves at the gym. But don’t jump to conclusions—you actually might want to follow their lead.
Sure, there are those who record themselves at the gym purely for attention. We’ve all seen “influencers” film more than they train or even go live during their workouts to entertain an audience. But recording your workouts for personal improvement is entirely different.
Filming your workouts is one of the best ways to elevate your gym performance, and unless you have a personal trainer, it’s the only way to ensure you’re performing exercises correctly, which is crucial if you want to see results and avoid injury.
Let’s look at some of the benefits of filming your workouts and tips for how to do it properly.
Benefits of Filming Your Workouts
Whether you’re just starting out or have years of experience, filming your sessions provides valuable feedback you can’t get from looking in the mirror or by relying on how an exercise feels.
Here are a few benefits you could be missing out on if you aren’t recording short clips of your workouts:
Ensures Proper Form and Technique
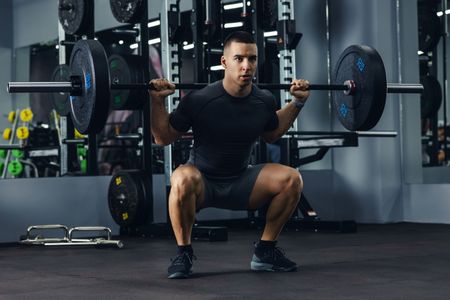
Are your knees caving in during squats? Is your back rounding on deadlifts? Are your shoulders staying stable during presses? Without a personal trainer or fitness coach, video feedback is the best way to know if your form is on point.
While a mirror is better than nothing, the view is limited. You have to observe from specific angles (which we will discuss further down) to know if your squat is deep enough or if your shoulders are in the correct position during presses.
Plus, it’s hard to fully pay attention while you’re mid-lift. Filming at least one set of each exercise provides a better look at your movements from start to finish.
By the way, form checks don’t only apply to beginners. Experienced lifters can develop subtle form issues over time. Regularly filming your workouts helps catch and correct these problems before they impact your progress or increase your risk of injury.
Reach Your Goals Faster
You can hit the gym every day, have a custom workout in hand, take the best pre-workout for your goals, and push yourself to the max, but if your form isn’t spot-on, you won’t effectively target the right muscles or build strength as efficiently as you could.
Will you still see some progress? Sure, but not nearly as much as you would with proper technique. Lifting with good form ensures the exercise is working the muscles it’s designed to target. Take lateral raises, for example. They’re a go-to for sculpting your shoulders, but it’s easy to unintentionally engage your traps instead.
Watching your form on video can help you spot any errors in your form and technique that could hold you back from seeing optimal results.
To Track Progress
A lot of people think progress is all about the number on the scale, but that doesn’t tell the full story. Videos capture physical changes in your body that the scale can’t, like how your muscles are becoming fuller and more defined or how your figure is getting smaller.
Progress isn’t just about aesthetics, either. Watching clips from weeks or months ago allows you to see how much you’ve improved in terms of form, technique, and performance.
To Avoid Injury
Mistakes in form are one of the leading causes of gym injuries. Most people think their form is good, but they’d likely spot issues if they watched themselves on video.
A quick review of your workout video can reveal if your posture, range of motion, tempo, or alignment need adjustments before they become problems that lead to injury.
To See if You are Pushing Yourself
Sometimes, the mind gives up before the body does. Watching your videos can reveal that you probably had more in the tank than you thought. Whether it’s an extra rep, more weight, or a tempo change, use your video feedback to see if you need to push yourself harder next time.
To Motivate Yourself and Inspire Others
Seeing your hard work on film, especially your progress over time, can be incredibly motivating. Comparing clips from one month to the next reminds you of how far you’ve come and what you’re capable of.
Sharing your journey with friends and family or on social media helps keep you accountable and provides positive reinforcement. Plus, you never know who’s watching—your progress might be the inspiration someone else needs to start their fitness journey.
How to Film Your Workouts
Many people are unsure how to set up their cell phone, don’t know what angle or direction they should be filming from, and are afraid that filming their workout will add too much extra time to their routine.
Filming your workout might seem complicated at first, and the first few attempts may require a bit of trial and error, but once you get the hang of it, it becomes quick and easy. Trust us, the benefits of recording your progress are worth the initial learning curve.
Here are some tips to help you film your workouts efficiently:
Check Your Gym’s Policies and Etiquette
First things first… you want to ensure you aren’t breaking any rules at your training facility. Before setting up your camera, make sure filming is allowed.
Some gyms only prohibit cameras in locker rooms and sauna areas, while others have much more strict rules about photography and videography. If you’re unsure, ask the gym staff for clarification.
Respect Others’ Privacy
If your gym does allow filming, always be mindful of the people around you. Most people don’t want to be in your gym videos. Avoid filming anyone without their consent, and keep your setup discreet.
Have a Stable Setup
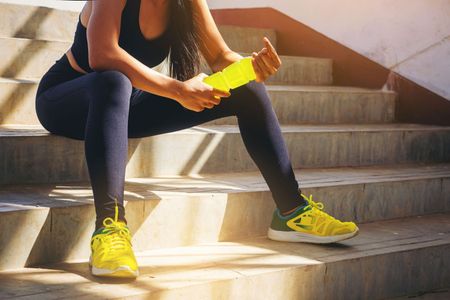
A sturdy tripod or phone mount can save a lot of time and make a big difference in the quality of your footage. It keeps your camera steady, frees your hands, and prevents awkward angles or shaky shots. You can also get creative by propping your phone on your water bottle, dumbbell, or other stable gym equipment.
Pick the Right Spot
Try to film in lower-traffic areas with minimal distractions and enough space to position your camera at the right angle without interrupting anyone else’s workout. Also, a video won’t do you much good if the lighting is bad. Try to position your camera so that the lighting is optimal.
Have a Plan Before You Hit Record
Think about what you want to capture. Are you focusing on your squat depth, bench press form, or overall progress? This will help you save time and ensure you are filming the correct angles.
Choose the Right Filming Angles for Each Exercise
The angle you choose to film from can make a huge difference in what you see in your footage. Filming at the wrong angle might miss key details.
Camera angles will vary based on gym lighting and even your height. You might have to experiment a little bit to get it right. Try filming from two perspectives and compare to see which gives the clearest view of your form.
Here’s a simple guide for some common exercises:
Squat
- Best Angles: 45-degree angle from the rear or side.
- Camera Height: Around hip level to capture the depth of your squat and the alignment of your knees and hips.
These angles show whether you’re hitting proper depth and maintaining good form through the movement.
Presses (Bench Press and Overhead Shoulder Press)
- Best Angles: 45-degree angle from the front or side.
- Camera Height: Shoulder height
This camera position should give you a clear view of elbow positioning and range of motion.
Deadlift
- Best Angles: 45-degree angle from the side or slightly in front.
- Camera Height: Waist level.
Shooting in this direction lets you see your back alignment, hip hinge, and bar path during the lift.
Biceps Curls
- Best Angles: Directly in front or slightly off to the side.
- Camera Height: Chest level.
These angles help you check elbow positioning, wrist alignment, and the range of motion throughout the curl. You’ll also be able to see if you’re using momentum (like swinging your body) instead of isolating the biceps.
Triceps Pushdowns
- Best Angles: Side angle or slightly off-center from the front.
- Camera Height: Waist to chest level.
This set up should capture your elbow positioning and ensure you’re fully extending the arms without engaging the shoulders. It also highlights whether you’re controlling the weight throughout the movement.
Glute Bridges or Hip Thrusts
- Best Angles: Side view or directly from the front.
- Camera Height: Hip level.
These angles let you see if you’re achieving full hip extension at the top of the movement and maintaining a stable core. A side view can also highlight your range of motion and foot positioning.
Do’s and Don’ts of Filming Your Workouts
Filming is an excellent tool for tracking progress, ensuring proper form, and motivating yourself to push harder. However, there are some do’s and don’ts of filming your workouts to keep in mind to make sure you’re filming efficiently and respectfully without taking away from your actual workout or causing any distractions to others in the gym.
Gym Filming Do’s
DO: Check Gym Rules
If your gym doesn’t allow filming, don’t try to sneak and film. These rules are typically in place to protect people’s privacy and ensure a comfortable environment for all members.
Instead, ask management if they would make an exception and allow you to film during times when the gym isn’t as busy or if they’d be willing to film for you to ensure other gym-goers aren’t captured in your video.
DO: Be Respectful of Others’ Privacy
It’s important to respect personal space and not make others feel uncomfortable while you’re filming. Always be mindful of the people around you, and avoid filming anyone else without their permission.
DO: Invest in the Right Filming Accessories
While a water bottle or dumbbell can work for many shots, certain angles are much easier to achieve with a small tripod or phone holder. There are compact tripods available that take up minimal space, and some even attach directly to your phone or wrap around gym equipment.
You can also find suction cups or magnet-based mounts that securely hold your phone in place, allowing you to film from unique angles without the hassle.
DO: Shoot at the Right Angle
Choose the right angle based on the exercise you’re doing. Experiment with different angles to get the most accurate view of your form.
DO: Film with Confidence
If you feel awkward filming yourself, you’re not alone. It’s completely normal to feel self-conscious at first, but over time, you’ll become more at ease with being on camera.
DO: Focus on Progress, Not Perfection
The purpose of filming your workouts is to look for errors. Everyone makes them. Use your footage to learn, grow, track progress, and celebrate small victories.
Gym Filming Don’ts
DON’T: Take Up Excessive Space
When filming in the gym, be mindful of where you set up your camera. Avoid blocking equipment or taking up a lot of space, especially during hours when the gym is crowded. Also, ensure that your setup doesn’t create a hazard that could result in someone getting hurt.
DON’T: Film Others Without Permission
Even if you’re only trying to capture your own workout, be mindful of other gym-goers who might be nearby and might accidentally be in your video. If someone is working out nearby, let them know why you are filming and ask for permission before filming.
DON’T: Feel Embarrassed
It’s normal to feel a little awkward when filming yourself in the gym. Whether you’re not used to being on camera or you’re self-conscious about your form, remember that it’s all part of the process. Everyone starts somewhere. Filming your workouts is an opportunity for growth!
DON’T: Let Filming Take Over Your Workout
Filming should complement, not dominate, your workout. Set up your camera quickly and efficiently, then focus on your training. Don’t feel the need to record every set. One clip of each exercise is plenty.
DON’T: Criticize Yourself
It can be hard to watch yourself on video, but stay kind to yourself! Instead of criticizing how you look or move, remind yourself why you’re doing this—to improve and document your fitness journey. Celebrate the effort you’re putting in, even if the videos aren’t perfect.
Final Thoughts
Whether you’re analyzing your form or checking your effort, the camera doesn’t lie. When done properly, respectfully, and efficiently, filming your workouts isn’t about being vain or showing off—it’s a necessary tool that will help you improve your form, avoid injury, track progress, and reach your fitness goals faster.
If you are ever unsure, don’t hesitate to ask a member of our staff to show you how to use any of our equipment properly. If you still need more help determining whether your form and technique are correct, it might be worth hiring a personal trainer.
A personal trainer can provide valuable feedback and help you perfect your technique, ensuring you avoid injury and make the most of your training sessions.
Our certified personal trainers at RAW Athletic Club can not only provide you with tailored workouts and nutritional guidance, they can show you how to do every exercise correctly to ensure you are using proper form and getting the most out of every rep!